![]()
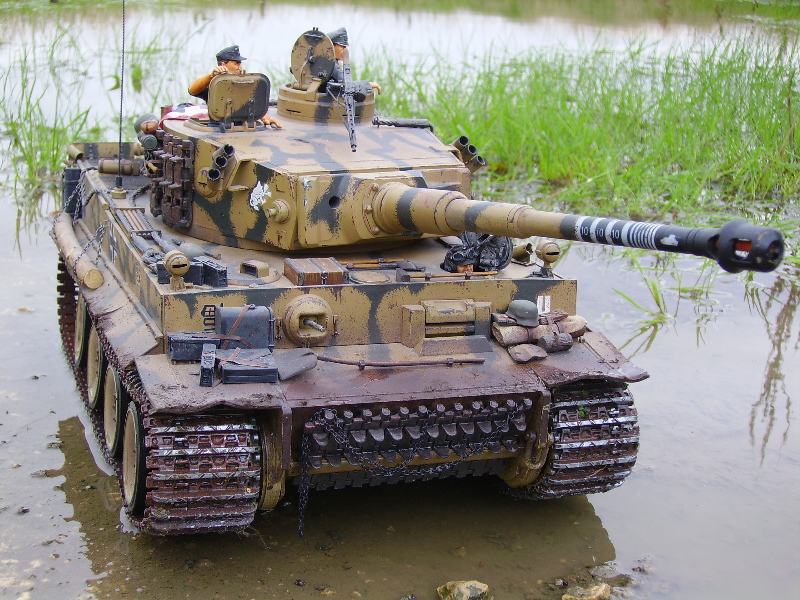
Tiger I Probably the most famous German tank of WWII, the mighty Tiger was a formidable and deadly opponent to every allied tank out there. The main gun of the Tiger was an 88mm KwK36. This was the superb weapon which was the improved version of the famous Krupp AG 88mm long-range cannon. The armour plating of the Tiger was 100mm thick in the front, 80mm on the sides, 110mm on the front of the turret and 80mm on the turret sides. In comparison the US M4 Sherman of the same period had frontal armour of only 51mm and side armour of only 38mm!!! The heavy armour and turret of the Tiger I resulted in an incredible fighting weight of 57 tons! A suitable power plant was required to move this beast and this was in the form of the Maybach HL210P45, a 23,000cc, 650hp 12 cylinder machine. Despite the heavy powerplant the Tiger I could still only achieve a maximum road speed of 38km/h. Although the maneuverability of the Tiger I was limited to say the least, because of its incredible attack and defense capabilities as well as the many proficient tank crews (the famous German tank ace, Whitmann for instance), the Tiger I provided a stalwart opposition to the allied forces. For example, it could use its huge 88mm gun against the smaller US tanks, picking off the Sherman at a range of 1800, while the Sherman had to close to within 700mm to penetrate the frontal armour of a Tiger I!!! This was my first RC tank build, a definate learning experience but thoroughly enjoyable. I was well and truly bitten by the bug, as you can see from the rest of this site! One of the great things about model tanks, especially radio controlled ones is you never actually finish them. As parts break or fall off through use, the model, just like the real thing begins to gain a character all of its own, as you can see from the later pictures, missing track skirts and scuff and scratch marks all go to make up an excellent looking model! |
The infamous Tiggy! |
The best view of a Tiger an Allied tanker could wish for! Note the filter plug which has been drilled out, add a little chain for that extra bling |
The additional tow cables are simply made from twisted electrical wire, again cheap, simple and effective...just how I like it! |
Nice view of the steel beast bearing down on you! |
Decided to add an MG for a little interest, not sure how accurate this is but I reckon on campaign anything goes! |
A close up of some of the stowage, the 'leather' straps are actually thin strips of electrical tape, painted and superglued in place, the buckles are painted on, simple but quite effective! |
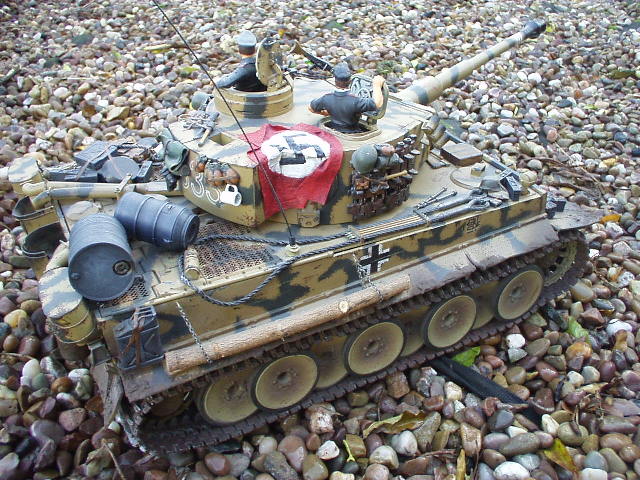
Maybe it's just an English thing, but I simply had to have a kettle and mug on there for tea breaks :O) |
Another close-up of the stowage addorning the turret |
The lights work too, boys toys uh?! |
Close-up of the scratch-built hatch detail, made from various bits from the spare parts box! |
Latest addition is the driver, notice the scratch built hatch interior. small patches of rust can be simulated with dark brown paint...easy uh! |
Fritz was looking forward to recieving his 'acme' booster cushion! |
Fritz and Hermann posed for snap.. |
Added a little splash of colour to break things up by making this ID flag, good old toilet roll! |
Recently been fiddling with the plastic card again and added these nice little scratch-built S-mines, this is the rear left hand shown |
Front left-hand S-mine, 5 alltogether, as if the tank wasnt already moaning under all the weight! |
||
 |
.JPG) |
.JPG) |
.JPG) |
.JPG) |
.JPG) |
.JPG) |
.JPG) |
.JPG) |
.JPG) |
.JPG) |
.JPG) |
.JPG) |
.JPG)
.JPG)
.JPG)
.JPG)
.JPG)
.JPG)
.JPG)
.JPG)
.JPG)
.JPG)
.JPG)
.JPG)
.JPG)
.JPG)
.JPG)
Site Design By Skud © Bulldog Models 2006 -2007 |