![]()
Smokin Kings
These instructions show how to get that King Tiger Smokin' up! Feel free to drop me an email if you require templates, parts or simply additionla info and I will try and help! |
Step 1
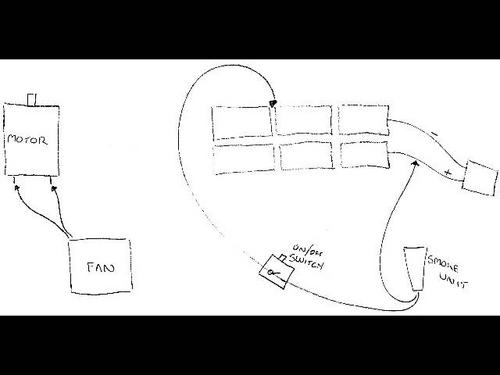
Ok, first things first. Connect the fan to the motor terminals. run the tank at full revs, if the fan works, well done! If it doesnt swap the wires around. You may find it useful to remove the tracks or chock the tank up so they are not in contact with the ground as you can easily test run the model as you build. next, we are going to wire the smoke generator directly into the tanks 7.2 battery. connect one wire directly into the red (positive +) wire (slice into the insulation and twist the wire open, insert your smoker wire and it should hold fine, secure with insulation tape) Now take the other wire and connect it via an on off switch between cell 4 and 5 of the battery. You will probably have to trim away the cardboard or plastic cover to access the cells, gently prize the cells apart and insert the wire, you may find it useful to 'fatten' the end of the wire up with a little solder for a tighter fit. Secure with insulation tape. give the smoker a whirl, make sure it works! Be very careful not to touch any exposed wires together as this will short out the battery! *hint* its a good idea to extend all your wires at this point to allow your self a little more room to manouvre, any excess can easily be tucked away after everything is in place
|
Step 2
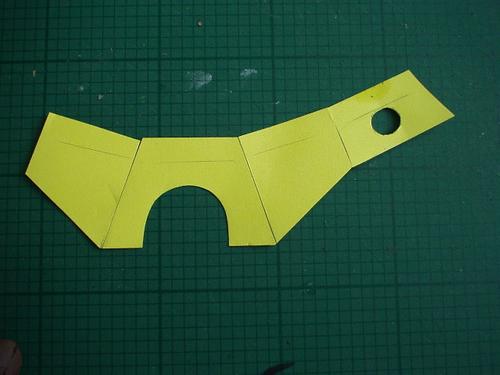
Next thing is to build the smoke box. I found it easier to build a mock-up from card first rather than waste the expensive brass sheet! You should end up with something like the picture. I will try and scan a 1/1 pattern sometime soon so drop me an email if you require a copy ;O) |
Step 3
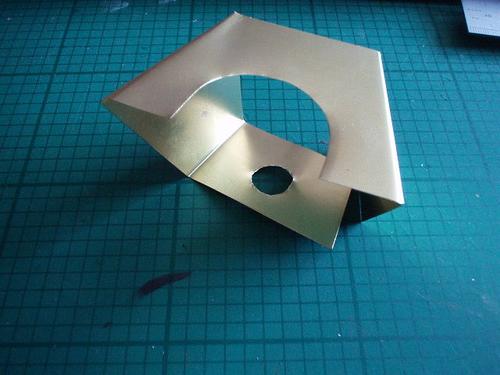
Transfer this onto the brass sheet (good hobby shops stock this .005 thickness). Cut it out with a sharp air of scissors and you should have a swanky looking box like the one above! Be very careful when handling the brass sheet as exposed edges can ve VERY sharp! |
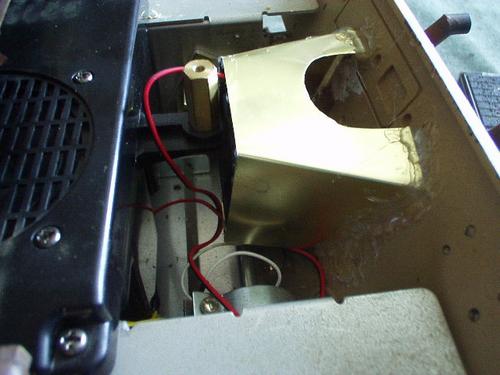
Step 4
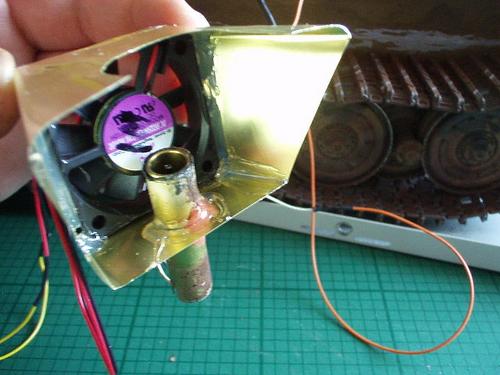
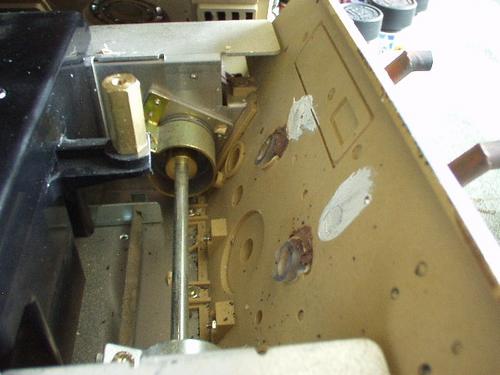
Next we assemble the fan and smoker into the box, dont be shy with the glue gun, use it as a sealant to fill all those gaps This picture shows the inside and position of the smoker. Oh, nearly forgot, I prefer to mount the smoker within a little brass tubing as this mans the glue doesnt come into direct contact with it, also makes it easier to replace if necassary |
Step 5
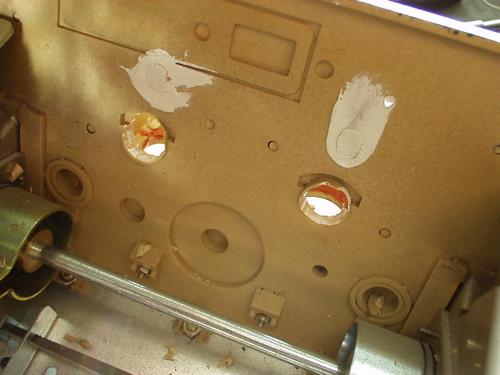
Ok, now onto the back. Drill out the two holes so they are large enough to take the tubing. |
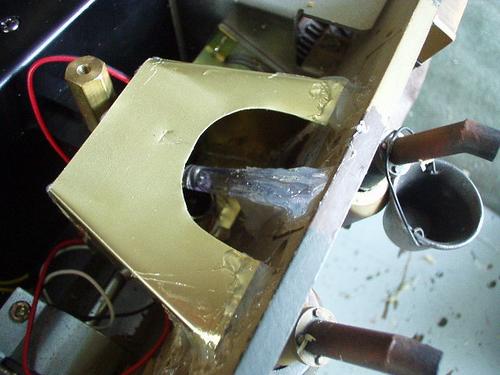
Step 6
Now insert the plastic tubing and push it through until it is in the correct position, trial and error, use your exaust caps to jusdge the correct height |
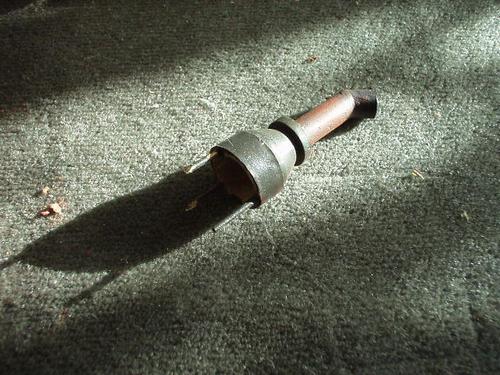
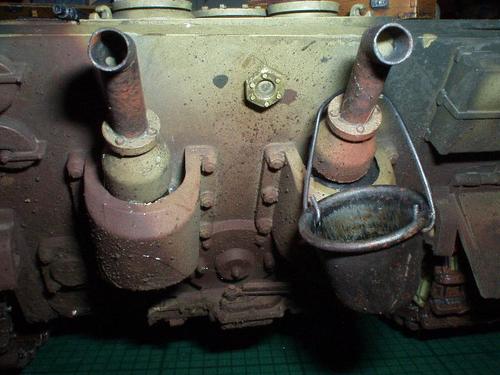
Step 7
Speaking of which, this is what you need to do to the rear exhaust, cut it down and either hollow the existing pipe out or make a new one from brass tube (thats what I did)
|
Step 8
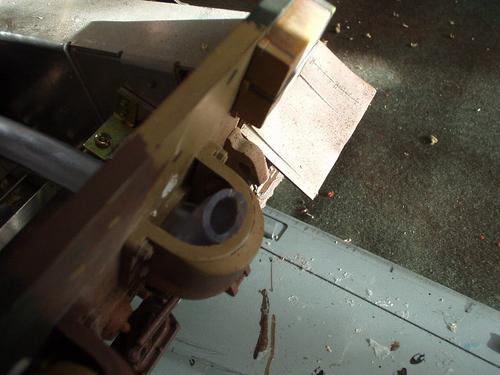
Once your happy with the position trim off the excess so it is just proud of the rear panel |
Step 9
Ok, out with the glue gun again! stick the whole box onto the rear plate, make sure it covers both exhaust holes. Seal the joins thoroughly with the glue gun, I found the end of a pencil was a good tool to work the hot glue into all the areas I couldnt reach Also note the hull mounting bracket, cut the plastic end down a little to ensure it does not interfere with the fans rota |
Step 10
drill a little hole at the back and feed some thinner tube, using trial and error find the right position for the tube to drip smoke fluid into the smoker, plenty of glue should hold this in place. this saves you having to remove the top to refill! |
Step 11
Trim off the excess of the filler tube. I made a little plug using some appropriate diameter plastic dowel and a bolt. Little dab of paint and a few plastic rivets and you can hardly notice it back there under all the mud :O) |
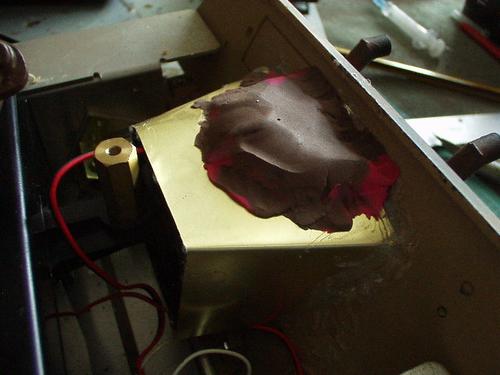
Step 12
Finally plug the large hole at the top with a little plastacine, use your fingers to smooth it around the edges and seal the top. This is a good non-permanant seal as it allows you to go in there every now and then and swab the excess oil out with a cotton bud. Give it a whirl and check for any leaks around the edges (a little will come out the front end where the fan is but this wont really make much difference). I also found that sealing the deck vents from underneath with a little black card helped to keep the smoke going where it should |
Site Design By Skud © Bulldog Models 2006 -2007 |